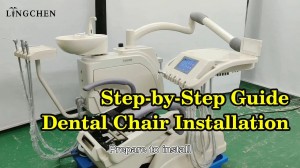
Installing a dental chair is a complex but crucial task that directly impacts the efficiency of a dental clinic and the comfort of patients. Below is a detailed installation guide to help you successfully set up a dental chair.
Preparation
1. Determine the Installation Location
- Space Measurement: Ensure the installation area has enough space not only for the dental chair but also for the movement of the dentist and assistants.
- Power and Water Supply: Check if there are suitable power outlets and water supply connections nearby.
- Floor Load Capacity: Confirm that the floor can support the weight of the dental chair.
2. Tools and Equipment Preparation
- The tools typically needed for installing a dental chair include screwdrivers, wrenches, drills, pipe wrenches, etc.
- Ensure all components are complete, including the chair body, armrests, footrest, headrest, light, syringe, and more.
Installation Steps
1. Base Fixation
- Determine Base Position: Mark the fixed positions on the floor according to the dental chair’s installation manual.
- Drill and Fix Bolts: Use a drill to create holes in the marked positions, then install expansion bolts or anchor bolts to secure the chair base.
2. Install the Chair Body
- Position the Body: Place the chair body on the base, aligning the bolt holes.
- Fix the Bolts: Use a wrench to secure the chair body to the base, ensuring it is stable.
3. Connect Power and Water Supply
- Power Connection: Connect the dental chair’s power cable to the outlet, ensuring the power voltage matches the outlet voltage.
- Water Supply Connection: Use a pipe wrench to connect the water pipes to the dental chair’s water system, checking the seals for tightness.
4. Install Armrests and Headrest
- Armrest Installation: Attach the armrests to both sides of the chair according to the manual, ensuring they are securely fastened and can move freely.
- Headrest Installation: Adjust the height and angle of the headrest to ensure comfort and proper support for patients.
5. Testing and Calibration
- Power Test: Power on and test the chair to ensure all functions (e.g., lifting, tilting, syringe) are working correctly.
- Water Test: Turn on the water supply, check for any leaks, and adjust the water pressure if necessary.
- Function Testing: Test all features of the dental chair, including the light, suction system, etc., to ensure everything operates normally.
Post-Installation Check and Maintenance
1. Safety Check
- Bolt Check: Recheck all bolts and nuts to ensure they are tight.
- Power Check: Confirm all electrical connections are correct and there are no exposed wires.
2. Maintenance
- Regular Inspection: Periodically inspect the dental chair’s functions, especially the power and water connections, to ensure there are no potential hazards.
- Cleaning and Care: Regularly clean the dental chair, especially parts prone to dirt accumulation, to maintain hygiene and durability.
Common Issues and Solutions
1. Dental Chair Fails to Lift
- Check if the power connection is normal and ensure the outlet has electricity.
- Inspect the control switch for damage, and contact the manufacturer for replacement if necessary.
2. Low Water Pressure in Syringe
- Check the water supply connection and pipes to ensure there is no blockage or leakage.
- Adjust the water system pressure, and clean or replace the filter if necessary.
3. Light Does Not Turn On
- Check the light’s power connection and switch to ensure they are in good condition.
- Replace the bulb or tube if it has aged.
Installing a dental chair requires meticulous attention to detail and patience. Following the installation manual strictly ensures every step is properly completed, guaranteeing the dental chair’s normal operation and patient comfort. If you encounter any unresolved issues, it is advisable to contact the dental chair manufacturer or professional maintenance personnel promptly.
Post time: Jul-14-2024

